A heat mat is a valuable tool for seed starting as it helps seeds germinate at higher rates and ensures the correct soil temperature for successful seed germination.
It is particularly beneficial for certain types of seeds that require specific temperature ranges. Using a heat mat can promote active microbiology in the soil, reduce the likelihood of molds and diseases, and help seeds sprout faster and develop stronger roots.
While a heat mat is not always necessary, it is recommended when starting seeds in colder environments or spaces without optimal ambient temperature.
It is especially useful for sprouting seeds that require warmth to germinate, such as solanaceous plants like tomatoes and peppers. The heat mat should be used until the seeds have germinated and sprouted their first true leaves.
Key Takeaways:
- Using a heat mat for seed starting promotes faster seed germination and healthier seedlings.
- Heat mats help create optimal soil temperature conditions for successful seed germination.
- They are particularly beneficial for seeds that require warmth to sprout.
- Using a heat mat can reduce the likelihood of mold and disease in the soil.
- It is important to select the right heat mat size and temperature range for your specific seed starting needs.
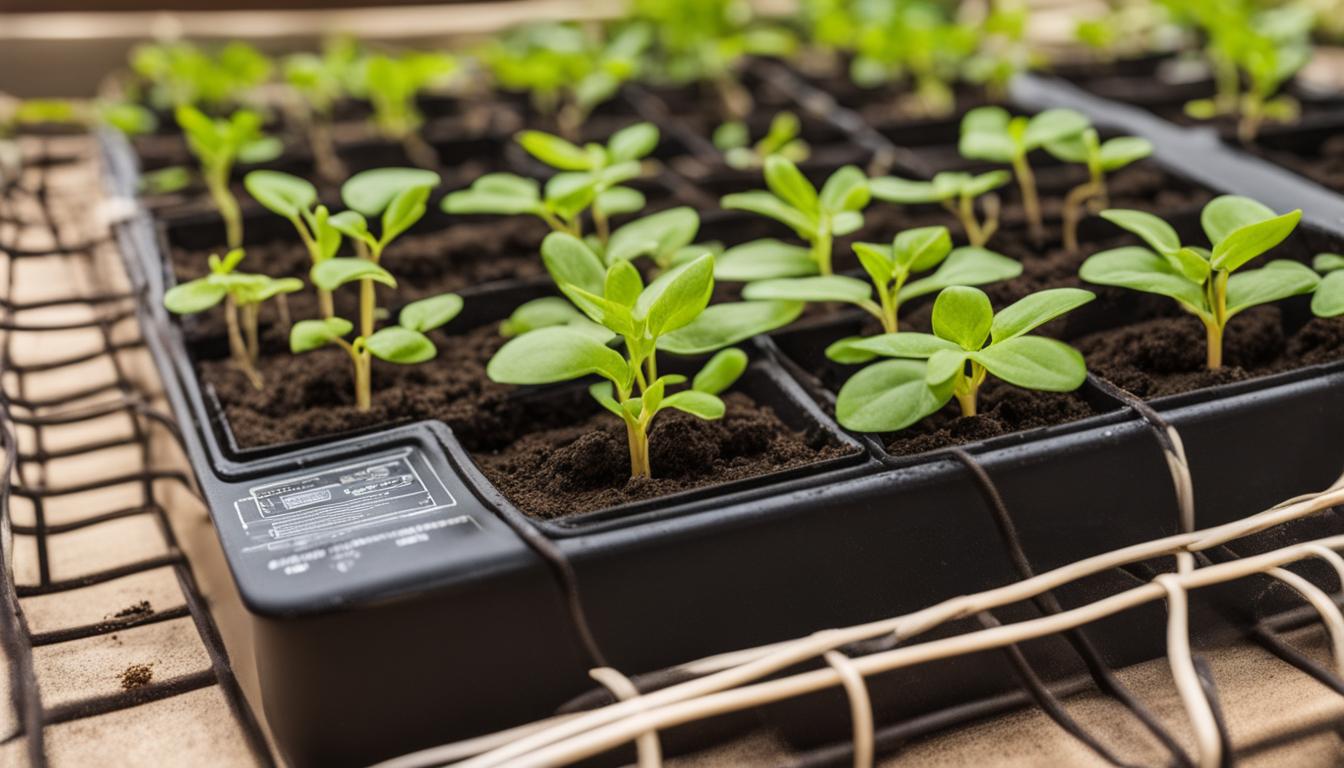
Understanding Seedling Heat Mats
Seedling heat mats are an essential tool for successful seed starting, especially during late winter or early spring when indoor seed starting is necessary. These mats provide controlled warmth to seedling trays, creating optimal conditions for seed germination and early seedling development.
Using a seedling heat mat can significantly improve germination rates, shorten germination times, and promote healthier seedlings.
There are several types of seedling heat mats available in the market. The most common ones are made of waterproof PVC plastic and have heating elements inside. These mats are durable, easy to clean, and provide even heating across the tray.
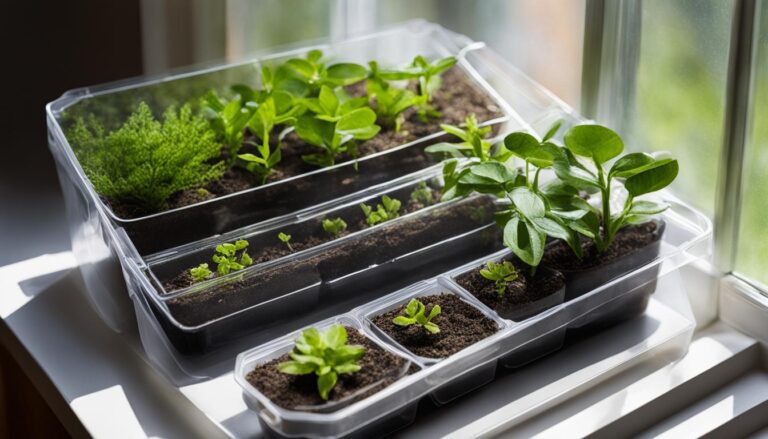
Another option is the seed tray, heat mat, and germination dome combo, which creates a mini greenhouse environment for the seeds. It helps retain moisture, promote humidity, and accelerate germination. While DIY options using household heating pads are possible, they are not recommended due to safety risks.
When choosing a seedling heat mat, consider factors such as size, temperature range, and the presence of a thermostat for temperature control. The size of the heat mat should match the size of the seedling trays or containers you are using.
It should also have a temperature range suitable for the seeds being started, ensuring that it provides the necessary warmth without overheating the seedlings. Some heat mats come with built-in thermostats, allowing for precise temperature control, while others may require a separate thermostat.
Types of Seedling Heat Mats
| Type | Description |
|---|---|
| Waterproof PVC Plastic Mats | Durable, easy to clean, and provide even heating; heating elements inside |
| Seed Tray, Heat Mat, and Germination Dome Combo | Create a mini greenhouse environment, retain moisture, promote humidity, and accelerate germination |
| DIY Options | Use household heating pads (not recommended due to safety risks) |
Using a heat mat for seed starting requires a few simple steps. First, ensure that the seed starting area is flat, dry, and suitable for placing the heat mat.
Place the heat mat on a shelf or table and plug it into an electrical outlet. Then, place the seed trays or containers on the heat mat, making sure to provide proper spacing. Insert the thermostat probe into the growing medium of one of the seed cells and use a dome cover to retain warmth and humidity.
Finally, plug the heat mat into the thermostat, adjust the temperature according to the specific requirements of the seeds, and monitor the temperature and moisture levels regularly to create an optimal environment for seed germination.
With the right seedling heat mat and proper usage, you can significantly improve the success of your seed starting process. The controlled warmth provided by the mat creates ideal conditions for seed germination and helps produce healthier, stronger seedlings.
Remember to choose the appropriate heat mat for your needs, follow the recommended steps for usage, and monitor temperature and moisture levels to ensure optimal results. Using a seedling heat mat can be a game-changer for your seed starting endeavors.
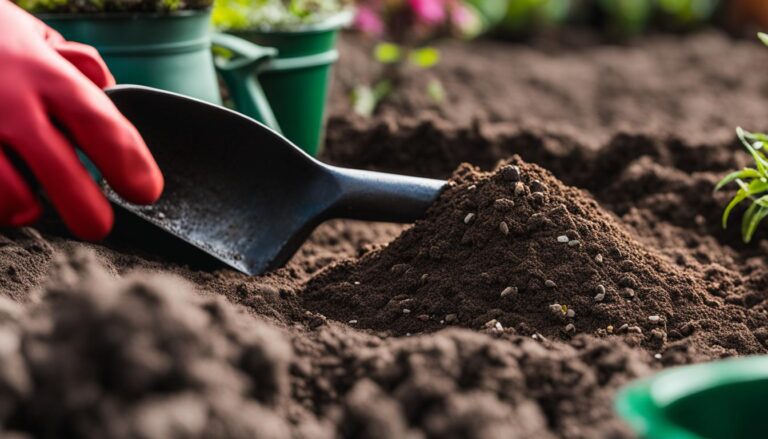
Why Soil Temperature Matters in Seed Starting
Soil temperature is a critical factor in the success of seed starting. The temperature of the soil directly affects seed germination rates and the subsequent growth of seedlings.
Different types of seeds have specific temperature preferences for germination, and providing the optimal soil temperature can significantly increase germination rates, shorten germination times, and promote healthier seedlings.
When the soil temperature is too low or too high, it can negatively impact seed germination. Seeds may remain dormant or fail to sprout altogether.
Proper soil temperature helps activate enzymes that break down seed coats and trigger the germination process. It also supports the growth of healthy root systems, which are crucial for seedlings to absorb water and nutrients from the soil.
It’s essential to research the specific temperature requirements of the seeds you are starting and ensure the soil temperature remains within the ideal range.
This can be achieved through the use of a heat mat, which provides consistent warmth to the seed trays. By maintaining the proper soil temperature, you can maximize germination success and increase the overall productivity of your seed starting efforts.
| Soil Temperature: | Impact on Seed Germination: |
|---|---|
| Too low (below recommended range) | Delayed germination, reduced germination rates |
| Optimal (within recommended range) | Increased germination rates, shorter germination times |
| Too high (above recommended range) | Delayed or inhibited germination, potential seedling damage |
Factors Affecting Soil Temperature
Several factors can influence soil temperature, including environmental conditions and the location of the seed starting area. Ambient room temperature, air circulation, and the heating system in the room all contribute to the overall soil temperature. Also, the use of grow lights, which generate heat, can also impact soil temperature.
It’s important to note that different seeds have different temperature preferences, so it’s crucial to understand the temperature requirements of the specific seeds you are starting.
Some seeds, like cool-season crops, prefer cooler soil temperatures, while others, such as warm-season crops, thrive in warmer soil.
By considering these factors and monitoring the soil temperature, you can create the ideal conditions for successful seed germination and seedling growth.
Remember, maintaining the proper soil temperature is just one aspect of successful seed starting. It’s also important to provide adequate moisture, light, and nutrients to support healthy and vigorous seedling growth.
By paying attention to these key factors, you can increase your chances of successfully starting seeds and nurturing strong, productive plants.

Determining When to Use a Heat Mat
When deciding whether to use a heat mat for seed starting, several factors should be considered to ensure the best conditions for germination.
First and foremost, the ambient room temperature plays a significant role. If the room temperature is already within the optimal range for seed germination, typically around 70-75 degrees Fahrenheit, a heat mat may not be necessary. Seeds can germinate and develop well in these conditions without the extra warmth provided by a heat mat.
However, if the room temperature is colder or if seed starting is being done in a cooler location like a basement or garage, a heat mat can be highly beneficial.
It helps to maintain the required soil temperature for successful germination. Some seeds, like those of solanaceous plants such as tomatoes and peppers, require warmth to germinate, and a heat mat can provide the necessary heat to promote their sprouting.
It is essential to research the specific temperature requirements of the seeds being started to determine if a heat mat is necessary.
To summarize, determine the need for a heat mat based on the ambient room temperature and the specific temperature requirements of the seeds being started.
If the room temperature is already within the optimal range and the seeds do not require additional warmth, a heat mat may not be necessary.
But, if the room is colder or if warmth is necessary for seed germination, using a heat mat can greatly improve the success rate of seed starting.
Factors to Consider When Determining the Need for a Heat Mat:
- Ambient room temperature
- Location of seed starting (indoors or in a basement/garage)
- Specific temperature requirements of the seeds
Pros and Cons of Using a Heat Mat:
| Pros | Cons |
|---|---|
| Can promote faster seed germination | Requires additional monitoring of temperature and moisture levels |
| Increases germination rates | Can be costly, especially for larger volumes of seeds |
| Results in healthier seedlings | May not be necessary in environments with optimal ambient temperatures |
Choosing the Right Heat Mat for Seed Starting
When it comes to selecting a heat mat for seed starting, there are several factors to consider to ensure you choose the right one for your needs. Here are some key considerations:
- Size: The heat mat should match the size of your seedling trays or containers. This ensures that the entire bottom surface of the trays is adequately heated, promoting uniform germination.
- Temperature Range: Look for a heat mat that offers a temperature range suitable for the seeds you are starting. Different seeds have specific temperature requirements for optimal germination, so it’s important to choose a mat that can provide the necessary warmth without overheating your seedlings.
- Thermostat: Some heat mats come with built-in thermostats, allowing you to easily control and adjust the temperature. This can be especially useful if you are starting seeds with different temperature requirements. If the heat mat doesn’t have a thermostat, consider purchasing a separate one for precise temperature control.
By taking these factors into account, you can select a heat mat that will create the ideal environment for successful seed starting.
Table: Comparison of Heat Mat Sizes and Temperature Ranges
| Heat Mat Size | Temperature Range |
|---|---|
| Standard | 70°F – 85°F |
| Large | 70°F – 90°F |
| Extra-Large | 70°F – 95°F |
Table: Comparison of heat mat sizes and temperature ranges. These are general ranges and may vary depending on the specific brand and model of the heat mat.
Remember to read product reviews, check return policies, and ensure that the heat mat you choose meets your specific requirements. With the right heat mat, you can create an optimal environment for seed germination and increase your chances of successful seed starting.
Steps for Using a Heat Mat for Seed Starting
Using a heat mat for seed starting is a simple and effective way to promote successful seed germination and ensure healthy seedling growth. By following these steps, you can maximize the benefits of using a heat mat for your seed starting process:
- Prepare the seed starting area: Before using a heat mat, ensure that the area where you will place it is flat, dry, and suitable for seed starting. This can be a shelf or table in a well-ventilated space.
- Place the heat mat: Position the heat mat on the shelf or table and plug it into an electrical outlet. Make sure the mat is securely in place and there are no obstructions blocking the heat from reaching the seed trays.
- Arrange the seed trays: Place your seed trays or containers on the heat mat, making sure to provide proper spacing between them. This will allow the heat to evenly distribute to each seedling.
- Adjust temperature and monitor: Insert the thermostat probe into the growing medium of one of the seed cells and use a dome cover to retain warmth and humidity. Plug the heat mat into the thermostat and adjust the temperature according to the specific requirements of the seeds being started. Regularly monitor the temperature and moisture levels to ensure optimal conditions for germination.
- Remove the heat mat: Once several seeds have sprouted and are showing signs of growth, it is time to remove the heat mat. This will prevent overheating of the seedlings and allow them to acclimate to normal room temperatures.
Ideal Temperature Range for Common Seeds
| Seed Type | Ideal Temperature Range (°F) |
|---|---|
| Tomatoes | 70-85 |
| Peppers | 75-90 |
| Lettuce | 50-70 |
| Cucumbers | 75-95 |
| Beans | 70-85 |
| Herbs | 60-80 |
Using a heat mat for seed starting can significantly improve germination rates and ensure that your seeds have the optimal conditions for successful growth. By following these steps and monitoring the temperature and moisture levels, you can give your seeds the best start possible.
Pros and Cons of Using a Heat Mat for Seed Starting
Using a heat mat for seed starting offers several advantages. Firstly, it promotes faster and more successful seed germination.
The controlled warmth provided by the heat mat creates the ideal conditions for seeds to sprout and develop into healthy seedlings. This can result in higher germination rates and ultimately lead to stronger and more robust plants.
Another benefit of using a heat mat is the ability to provide specific temperature ranges for different types of seeds.
Some seeds have temperature requirements for germination, and a heat mat allows you to maintain those optimal temperatures consistently. This can be especially useful in colder environments or when starting seeds in spaces without ideal ambient temperatures.
However, it’s important to consider the downsides of using a heat mat as well. Heat mats require additional monitoring of temperature and moisture levels to prevent overheating or drying out the soil.
This extra attention can be time-consuming and may require regular adjustments. Additionally, heat mats can be costly, especially if you have a large-scale seed starting operation that requires multiple mats.
| Pros of Using a Heat Mat for Seed Starting | Cons of Using a Heat Mat for Seed Starting |
|---|---|
| Promotes faster seed germination | Requires additional monitoring of temperature and moisture levels |
| Increases germination rates | Can be costly, especially for large-scale seed starting |
| Results in healthier and stronger seedlings | May not be necessary in environments with already optimal ambient temperatures |
Ultimately, the decision to use a heat mat for seed starting should be based on your specific needs and circumstances. Consider factors such as the ambient room temperature, the temperature requirements of the seeds being started, and the level of hands-on monitoring you are willing to commit to.
By weighing the pros and cons, you can make an informed decision about whether a heat mat is right for your seed starting endeavors.
Germination Tips for Using a Heat Mat
Using a heat mat for seed starting can greatly optimize the germination process and increase the success rate of your seeds. Here are some important tips to follow when using a heat mat:
- Research the temperature requirements: Different seeds have different temperature preferences for germination. Make sure to research and understand the ideal soil temperature for the specific seeds you are starting. This will help you set the heat mat to the appropriate temperature, ensuring optimal conditions for germination.
- Monitor the temperature: Use a thermometer to regularly monitor the temperature of the growing medium. It should remain within the optimal range for the seeds being started. Adjust the heat mat temperature accordingly to maintain the desired warmth.
- Maintain moisture levels: Proper moisture is crucial for seed germination. Regularly mist the growing medium to keep it moist, but be cautious of overwatering. Using a moisture meter can help you monitor the moisture levels effectively.
- Remove the heat mat at the right time: Once several seeds have sprouted and the seedlings have developed their first true leaves, remove the heat mat. Continuing to use the heat mat at this stage can lead to overheating and potentially harm the seedlings.
By following these germination tips, you can maximize the benefits of using a heat mat for seed starting. Remember to always research the temperature requirements of your seeds, monitor the temperature and moisture levels, and use caution to avoid any potential issues.
| Tips | Benefits |
|---|---|
| Research temperature requirements | Ensures optimal conditions for germination |
| Monitor the temperature | Prevents overheating or inadequate warmth |
| Maintain moisture levels | Supports proper seed germination |
| Remove the heat mat at the right time | Prevents overheating of seedlings |
Using Grow Lights and Heat Mats Together
Combining grow lights and heat mats can greatly enhance the success of your seed starting process. While heat mats provide the necessary warmth for seed germination, grow lights ensure that seedlings receive adequate light for photosynthesis, enabling healthy growth and development. By using these two tools together, you can create optimal conditions for your seeds to sprout and thrive.
When using grow lights and heat mats in tandem, it’s important to maintain proper spacing between the light source and the heat mat.
This prevents direct contact and the potential for overheating the seedlings. Position the heat mat beneath the seed trays or containers, ensuring an even distribution of warmth.
Place the grow lights above the seedlings, providing sufficient light intensity and duration according to the specific requirements of the plant species you are growing.
Benefits of Using Grow Lights with Heat Mats
Using grow lights in conjunction with heat mats offers several advantages. Firstly, it allows you to start seeds earlier in the growing season, as you are not solely reliant on natural sunlight.
This is particularly beneficial for those who live in regions with shorter growing seasons or limited access to sunlight. Also, combining grow lights and heat mats can accelerate the overall growth and development of your seedlings, resulting in more robust and healthy plants.
Choosing the Right Grow Lights
When selecting grow lights for seed starting, consider factors such as light intensity, spectrum, and energy efficiency. LED grow lights are a popular choice, as they provide a full spectrum of light suitable for all stages of plant growth while consuming less energy.
Compact fluorescent (CFL) lights are another option, especially for smaller-scale seed starting. Whichever type of grow light you choose, ensure it emits sufficient light to meet the needs of your specific plants and can be positioned at an appropriate distance from the seedlings.
| Grow Light Type | Advantages | Disadvantages |
|---|---|---|
| LED | Energy-efficient, full spectrum, long lifespan | Higher upfront cost |
| CFL | Cost-effective, suitable for smaller spaces | Less energy-efficient, shorter lifespan |
Table: Comparison of LED and CFL Grow Lights
By combining grow lights and heat mats, you can provide the ideal conditions for seed germination and seedling growth. This enables you to extend your growing season, start seeds earlier, and produce healthier plants.
Remember to monitor the temperature and light levels regularly to ensure they remain optimal for your specific seedlings. With the right setup and care, your seeds will thrive and grow into strong, vibrant plants.
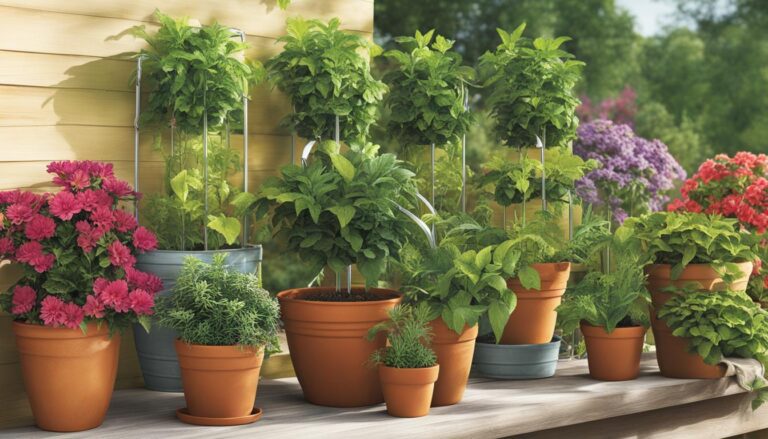
Scaling Up with Multiple Heat Mats
When it comes to seed starting on a larger scale, using multiple heat mats can be a game-changer. It allows you to maximize your growing capacity and increase the number of seeds you can successfully germinate.
By using multiple heat mats, you can create optimal conditions for each tray or container, ensuring that every seed has access to the warmth it needs to sprout and thrive.
One of the key considerations when scaling up with multiple heat mats is to plan your space effectively. Determine the available area and the number of seedling trays or containers you will be using.
This will help you decide how many heat mats you will need and how to arrange them for efficient use of space. Keep in mind that each heat mat should be connected to a separate electrical outlet to ensure proper functionality and avoid overloading circuits.
As you expand your seed starting operation, it’s essential to monitor the temperature of each heat mat individually. This will help you maintain optimal conditions for each batch of seeds and prevent any potential issues related to uneven heating.
Also, consider the water-resistant nature of heat mats – while they can withstand some moisture exposure, they are not fully waterproof. Take precautions to avoid any water-related accidents that could damage the mats or compromise electrical safety.
| Benefits of Using Multiple Heat Mats for Seed Starting | Considerations When Using Multiple Heat Mats |
|---|---|
|
|
Scaling up with multiple heat mats gives you the opportunity to take your seed starting to the next level. Whether you’re a commercial grower or a dedicated gardening enthusiast, this approach allows you to increase your productivity and grow a wider variety of plants from seeds.
Just be sure to plan your space effectively, monitor temperatures diligently, and follow safety guidelines to make the most of this expansion.
Scaling Up with Multiple Heat Mats
After exploring the benefits and considerations of using a heat mat for seed starting, it is clear that this tool can greatly enhance the success of your seed germination and seedling growth.
By providing the necessary warmth, heat mats can accelerate sprouting, increase germination rates, and promote healthier root development. They are particularly useful for seeds that require specific temperature ranges and for starting seeds in colder environments.
However, it is important to remember that not all seeds require a heat mat, and the decision to use one should be based on the specific temperature requirements of the seeds and the ambient room temperature.
Monitoring the temperature and moisture levels is crucial to prevent overheating or drying out the soil. Using a heat mat in combination with other tools like grow lights can further optimize seed starting conditions.
When choosing a heat mat, consider factors such as size, temperature range, and the presence of a thermostat for temperature control. It is also important to use caution and follow proper usage guidelines to ensure the safety of both the seedlings and your environment.
With these considerations in mind, a heat mat can be a valuable addition to your seed starting process, maximizing the success of your seed germination and setting your seedlings up for healthy growth.
FAQ
How do I use a heat mat for seed starting?
To use a heat mat for seed starting, place it on a flat and dry surface. Plug it into an electrical outlet and place the seed trays or containers on top. Insert the thermostat probe into the growing medium, cover with a dome for warmth and humidity, and adjust the temperature according to the seed requirements. Monitor temperature and moisture levels regularly and remove the heat mat once seeds have sprouted.
Why is soil temperature important in seed starting?
Soil temperature affects seed germination rates and seedling growth. Different seeds have different temperature preferences, and providing optimal soil temperature increases germination rates and promotes healthy seedlings. Proper soil temperature also prevents issues like damping off and promotes strong root development.
When should I use a heat mat for seed starting?
A heat mat is recommended when starting seeds in colder environments or spaces without optimal ambient temperature. It is especially useful for sprouting seeds that require warmth to germinate, such as solanaceous plants like tomatoes and peppers. If the ambient room temperature is already within the optimal range for seed germination, a heat mat may not be necessary.
How do I choose the right heat mat for seed starting?
When selecting a heat mat, consider factors like size, temperature range, and the presence of a thermostat for temperature control. The heat mat should match the size of the seedling trays or containers used and have a temperature range suitable for the seeds being started. It’s also important to read product reviews and ensure the heat mat meets your specific needs.
What are the pros and cons of using a heat mat for seed starting?
The advantages of using a heat mat include faster seed germination, increased germination rates, and healthier seedlings. However, heat mats require additional monitoring of temperature and moisture levels, can be costly, and may not be necessary in environments with already optimal ambient temperatures.
How can I optimize seed germination with a heat mat?
To optimize germination with a heat mat, research the temperature requirements of the seeds, monitor the temperature with a thermometer, mist the growing medium regularly, and use a moisture meter to regulate watering. It’s important to be cautious of potential hazards like overwatering or electrical issues related to the heat mat.
Can I use grow lights and heat mats together for seed starting?
Yes, grow lights and heat mats can be used together to create optimal conditions for seed germination and seedling growth. However, ensure proper spacing between the light source and heat mat to avoid direct contact.
How can I scale up seed starting with multiple heat mats?
If you have larger-scale seed starting needs, using multiple heat mats can be beneficial. Determine the most suitable arrangement based on available space and the number of seedling trays. Each heat mat should be connected to a separate electrical outlet, and temperature should be monitored individually for each mat.

One Comment
Comments are closed.